Creating memories in the kitchen...One meal at a time.

Wednesday, April 27, 2011

Asparagus with Orange Hollandaise Sauce


Hollandaise, the classic sauce for dressing warm asparagus in France, is usually flavored with lemon. The orange juice used in this recipe is a nice change of pace and goes particularly well with the vegetable.

My sister Julia made this for Easter and it was delicious. The hollandaise sauce was really light and the hint of orange was perfect. This would also pair well with a roasted chicken or pork tenderloin.
 
 
**Keep in mind these few simple tips: Make the sauce over simmering water instead of over direct heat; too much heat will only cook the egg yolk rather than thicken the sauce. A bowl rather than the top pan of a double boiler contributes to a smoother whisking of the sauce. And finally, softened butter blends in more readily than the more commonly used melted butter. **

Ingredients:

For the orange hollandaise sauce:


  • 2 egg yolks
  • 3 Tbs. fresh orange juice
  • 6 Tbs. (3/4 stick) unsalted butter, cut into slices 1/4 inch thick, at room temperature
  • Salt and freshly ground pepper, to taste

  • 1 1/2 lb. asparagus spears
  • 2 tsp. salt
  • 1 orange

Directions:


To make the sauce, place the egg yolks and 2 Tbs. of the orange juice in a heatproof bowl or the top pan of a double boiler. Set the bowl or pan over but not touching hot or barely simmering water in a saucepan or the bottom pan of the double boiler. Whisk continuously until warm and just beginning to thicken, about 1 minute. Add the butter 1 slice at a time, whisking until fully absorbed before adding more. When all of the butter is absorbed, continue to whisk until thickened, 2 to 3 minutes. Do not overcook.

Remove the bowl or pan from the pan of hot water, and season the sauce with salt and pepper. If the sauce is too thick, stir in as much of the remaining 1 Tbs. orange juice as needed to thin to the desired consistency. You should have about 3/4 cup sauce. Remove the bottom pan from the heat and let the water cool slightly. Then set the bowl or pan with the sauce over the warm water and cover loosely with a paper towel to prevent a skin from forming.

Cut or break off the tough white ends from the asparagus spears. Trim all the spears to the same length. If the spears are large, use a vegetable peeler to peel away the tough skin, starting 2 inches below the tip.

Pour water into an asparagus steamer, add the 2 tsp. salt and bring to a boil over high heat. Place the spears, tips up, in the basket and steam just until tender, 2 to 3 minutes.

Remove the asparagus from the steamer and divide among 4 warmed plates, arranging the spears in a row. Spoon the warm hollandaise sauce in a wide stripe across the middle of the asparagus. Using a zester or fine-holed shredder, and holding the orange over each serving, shred a little zest from the orange peel directly over the hollandaise on each serving. Serve immediately.

Serves 4.
 
Posted by: Sallie & Julia
Pin It!

Monday, April 25, 2011

Pasta in Tomato Cream Sauce

I'm always searching for quick and easy meals that are delicious for weeknight cooking.  This recipe couldn't get any easier, yet it tastes like you spent all day on it.

Pasta In Tomato Cream Sauce
from 30 Minutes or Less

Ingredients:
8 oz. penne or other tube pasta
1 (14.5 ounce) can Del Monte Diced Tomatoes with Garlic & Onion
1/2 cup fresh basil, chopped OR 1 teaspoon dried basil
3/4 cup whipping cream
1/3 cup Parmesan cheese, grated
Diced cooked chicken breast (optional)

Directions:
Cook tomatoes over medium-high heat in skillet until thickened, about 5 minutes.  Reduce heat; add basil, cream and chicken (if using).  Heat through.  DO NOT BOIL.  Toss with pasta and cheese.  Serve immediately.

Posted by:  Julia
Pin It!

Monday, April 18, 2011

Easter Goodies, and Brunch and Dinner oh my!

I love this time of year, but come to think of it, if it relates to cooking I love pretty much anytime of year. Hearty, comforting food for winter (and of course lots of goodies), fresh, brightly colored food during spring  and tasty grilled anything in summer, and don't forget all the delicious fruits of the harvest-- apples, pumpkin, cinnamon for fall. Yum.

I'm hosting Easter this year and can't wait. I love seeing all the girls in their pretty dresses, watching my kids hunt for eggs, and enjoying the one time of year in St. George that you can usually go outside without melting!

Here's what's on our Menu:


Brunch

I'm keeping it simple this year (gotta get to church and with 3 little girls hair to do plus my own, you get the picture.)

Quiche Lorraine

Cinnamon Coffee Cake Muffins

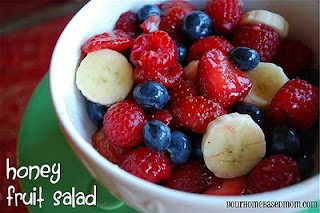
an adaptation of this salad-  I using strawberries, kiwis, canteloupe and grapes. Maybe some pineapple too.

Juice


Next comes..........................
The treats. I mean we need something to tide us over until dinner. Right?

Peanut Butter Eggs-these will go perfectly in the kids baskets.
Sugar Cookies in Easter shapes and colors


and last but not least.......

Dinner

Deviled Eggs (and it's a good thing. I think my kids have been asking me to make them repeatedly since last Easter.)

Cheesy Roasted red pepper dip with bread and crackers

Maple Glazed Ham

Funeral Potatoes

Green Salad

Asparagus in some form

Crescent Rolls

Carrot Cake

Either this key lime pie

and something lemon for sure.

Happy Easter from My Sister's Kitchen

Posted by : Sallie
Pin It!

Wednesday, April 13, 2011

Hunka Chunka Chewy Chocolate Chip Cookies

Photo by Leigh Beisch

Another big hit from Sticky, Chewy, Messy, Gooey Treats for Kids . I have a feeling this book is going to get a lot of use. The names of all the recipes are so cute and the book itself is lovely.

Being a firm believer that there is no such thing as too many chocolate chip cookie recipes, I added this to my list. What drew me to this recipe (besides the name and the irresistible picture) was the amount of chocolate called for. I like a good proportion of chocolate in my chocolate chip cookies and this recipe definitely delivered. These would be perfect for a bake sale individually wrapped or stacked in cellophane bags.

A quote directly from the author  sums it up perfectly. "These big, fat, saucer-size cookies are crisp around the edges but lusciously soft and chewy in the center. Chockfull of chips and picture perfect, they have been sampled many times to great acclaim-touted as much for their simplicity as their flavor. Starting the batter with melted butter keeps these cookies chewy and dense, and chilling the dough for a little while before baking yields cookies that one young tester told me "look like they came from the bakery." Compliments, indeed. "


Hunka Chunka Chewy Chocolate Chip Cookies
Sticky, Chewy, Messy, Gooey Treats for Kids


Makes 18 big cookies


1 cup (2 sticks) unsalted butter, melted and cooled

1 cup firmly packed dark brown sugar

1 cup granulated sugar

1 tablespoon pure vanilla extract

2 eggs, plus 1 egg yolk

3 cups all-purpose flour

1 teaspoon baking soda

1 teaspoon salt

3 cups semisweet chocolate chips

Line 2 baking sheets with parchment paper or coat lightly with nonstick cooking spray. Set aside.

In a large bowl, mix together the melted butter, sugars, vanilla, eggs, and egg yolk. Sift the flour, baking soda, and salt into the bowl and stir the ingredients together to form a soft dough. Stir in the chocolate chips.

Using a 2-ounce self-releasing ice-cream scoop or a 1/4-cup measuring cup, form large balls of cookie dough. Place on a parchment paper-lined baking sheet, 9 to a sheet to allow room for spreading, and chill the dough for at least 30 minutes or up to overnight.

Preheat the oven to 350°F.

Bake the cookies until they are golden brown and crisp around the edges but still slightly soft in the center, 15 to 17 minutes. Transfer to a wire rack and allow cookies to cool completely on the baking sheet before eating.

Posted by: Sallie
Pin It!

Monday, April 11, 2011

Pico De Gallo

Picture from Pioneer Woman

My husband loves him some pico. Even though I don't really like tomatoes (don't get me started on the seeds and juicy stuff), I love it too. It does involve some chopping but I think it's therapeutic and the results are delicious! It looks so fresh and is so healthy.  There are so many ways you can use pico. We love it with tortilla chips, mixed with this rice, inside burritos, and mixed with guacamole. The options are endless.

Pico De Gallo
Pioneer Woman

FOR THE PICO DE GALLO:


■5 whole Plum (roma) Tomatoes

■½ whole Large (or 1 Small) Onion

■3 whole Jalapeno Peppers

■Cilantro

■Lime Juice

■Salt To Taste


Chop jalapenos, tomatoes and onions into a very small dice. (Leave seeds in your jalapenos for a hotter pico). Adjust amount of jalapenos to your preferred temperature. Next, chop up a nice-sized bunch of cilantro. Just remove and discard the long leafless stems before chopping. No need to remove the leaves from the stems completely. Place all of these ingredients together in a bowl and give it a good stir.

Squeeze the juice of half of one lime into the bowl. Add salt to taste and stir again. Makes about 2 cups.

Posted by: Sallie
Pin It!

Tuesday, April 5, 2011

Peanut Butter Pretzel and Toffee Bon Bons

Picture From Mel's Kitchen Cafe


When I saw this recipe I knew resistance was futile. Chocolate, peanut butter, pretzels, toffee. Who could say no to that. Certainly not me. Apparently not my husband either. Even though he's been watching what he eats, when treat time comes that's the first thing he reaches for. Apparently not my children either who may or may not have snuck them on their breakfast plates.

I love the combination of creamy peanut butter with the added crunch of the toffee bits and pretzels. Of course the fact they are dipped in chocolate totally seals the deal.

I have been dreaming up different ways to change these. Dip them in white chocolate, rainbow sprinkles for the kids, or white for a more classy look. I also purchased the  book this recipe came from.  It has so many yummy treats and is one of the cutest cookbooks ever!  Trust me, you want to make these.


*Note: to chop the pretzel sticks, I place several large handfuls of pretzel sticks in a ziploc bag, seal, and roll over the top with a rolling pin until the pretzels are crunched up well. I measure out of the bag and continue the process until I have 2 cups. These bonbons can be made up to three days in advance. The peanut butter pretzel filling can be made and formed into balls and frozen for up to 2 months before dipping.


Peanut butter pretzel and toffee bon bonsMel's Kitchen Cafe and Sticky, Chewy, Messy, Gooey Treats for kids


*Makes about 5 dozen*


8 tablespoons butter, softened to warm room temperature

2 cups powdered sugar

2 cups peanut butter

1 cup toffee bits

2 cups chopped/crushed pretzel sticks

1 pound chocolate (semisweet, milk, bittersweet)

2 tablespoons shortening or butter

Toffee, chopped nuts, chocolate jimmies for garnish


In a large bowl with an electric mixer, cream the butter and sugar together until evenly combined. Add the peanut butter and mix well, scraping down the sides of the bowl as needed. Stir in the toffee bits and pretzel pieces by hand with a wooden spoon or rubber spatula.

Line a large rimmed baking sheet (12X18-inches or several smaller baking sheets) with parchment or waxed paper. Roll the peanut butter mixture into 1-inch or so (it doesn’t have to be exact) balls and place them on the lined baking sheets. Cover loosely with plastic wrap and freeze for 15-20 minutes until firm. At this point, the balls can be transferred to a sealed container or freezer ziploc bag and frozen for up to 2 months.

Meanwhile, melt the chocolate and shortening/butter together in a microwave-safe bowl or in a double boiler until completely melted and smooth (taking care not to overheat the chocolate as that can cause white streaks, bloom, to appear in the hardened chocolate).

One by one, toss a formed peanut butter/pretzel ball into the melted chocolate and using a fork, cover the ball with chocolate. Lift the covered bonbon out of the chocolate with the fork and tap the lower stem of the fork (right above where the rectangular tined fork part ends) on the edge of the bowl to let excess chocolate fall through the tines of the fork. Scrape the bottom of the fork along the edge of the bowl and transfer the covered bonbon to a parchment lined baking sheet (you can use the same baking sheet(s) used for freezing the balls if you have room). Set the bonbon very close to the parchment paper and using a second fork or butter knife, gently scoot the bonbon off the fork onto the baking sheet. Immediately sprinkle your garnish of choice on the top of the wet chocolate before it sets.

Refrigerate the bonbons until ready to serve.


Posted by:Sallie
Pin It!
Related Posts Plugin for WordPress, Blogger...